I love "Sea Glass" its all over any beach and can be used to make jewelry, dishes around the house, paintings, or anything....It is colorful and is already dulled by nature.... :)
This is an amazing sand castle built with those pretty "sea glass" pieces you can find on the beach....
“THIS house is called " Clingstone" — a faded, shingled and, yes, very rough 103-year-old mansion set on a rock in Narragansett Bay — and Mr. Wood, its owner, built by a Vanderbilt in 1895.
But in fact it’s the rough edges and salt-encrusted surfaces that Mr. Wood, a 79-year-old Boston architect, treasures most about Clingstone. For nearly half a century, he has kept them (more or less) intact, and the house standing, through his own hard labor and that of others. He and a crew of family and friends who share his passion for the place’s “deep bohemian funk,” as Nicholas Benson, a stone carver from Newport, put it, have dedicated their time and skills (plumbing and wiring experience are always particularly welcome) to keeping the place from slipping into the water forever.
In 1961, when Mr. Wood bought the house with his ex-wife Joan, who is also an architect, for $3,600, it had been empty for two decades. All of its 65 windows were smashed, and its slate roof was wide open to the sky. Vandals had been creative: on the second floor, the interior shingles were embedded with marbles (they still are), which had been blasted there by some sort of firearm.
The house, he learned, had been built by a distant cousin, J. S. Lovering Wharton, from Philadelphia, who had a summer house in the Fort Wetherill area in south Jamestown.
Working with an artist, William Trost Richards, Mr. Wharton designed a shingle-style house of picture windows, with 23 rooms on three stories radiating off a vast central hall; its plan is less a blueprint than a diagram of arrows indicating sightlines.
He built it like a mill, Mr. Wood said, with wide planking, sturdy oak beams, diagonal sheathing and an odd flourish: an interior cladding of shingles, put there, Mr. Wood conjectured, because Fort Wetherill’s cannons went off so regularly in training exercises that they cracked the plaster in the neighbors’ houses.
Mr. Wharton loved his new house, and spent every summer there until his death just before the hurricane of 1938, which the house survived with little damage.
After his widow died, in 1941, the house stood empty until Mr. Wood and his wife came upon it. The story, Mr. Wood said, is that Mr. Wharton’s three sons disliked one another so much, they couldn’t agree on who to sell it to. “I think they only sold it to me because I was a relative,” he added.
Every spring for a decade or so after the sale, Mr. Wood said, he cursed “this albatross,” his roofless, windowless, floorless, powerless, waterless house. Wrangling what had been a rich man’s plaything, attended by servants and even its own shipyard, into a working couple’s weekend getaway turned out to be much more than a working couple could handle. Eventually, though, as the Woods mustered the talents of their friends, Clingstone and its maintenance evolved into a communal lifestyle, and ultimately a kind of religion. What a story. :)
_________________________________________________________________
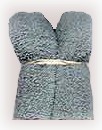
Over at Just Something I Made I found this unique and cool idea. I have a ton of cards from Las Vegas and thought this would be great to make a fan with, but I like the idea of making it with kids playing cards to make it more colorful, now I think that I may take it a step further and add some glitter and make a Red Hats fan or a "Queen's" fan, one made with "Queen" cards!!!
--------------------------------------------------------------------------------------------
Easy make a necklace DIY Chic shows you how...